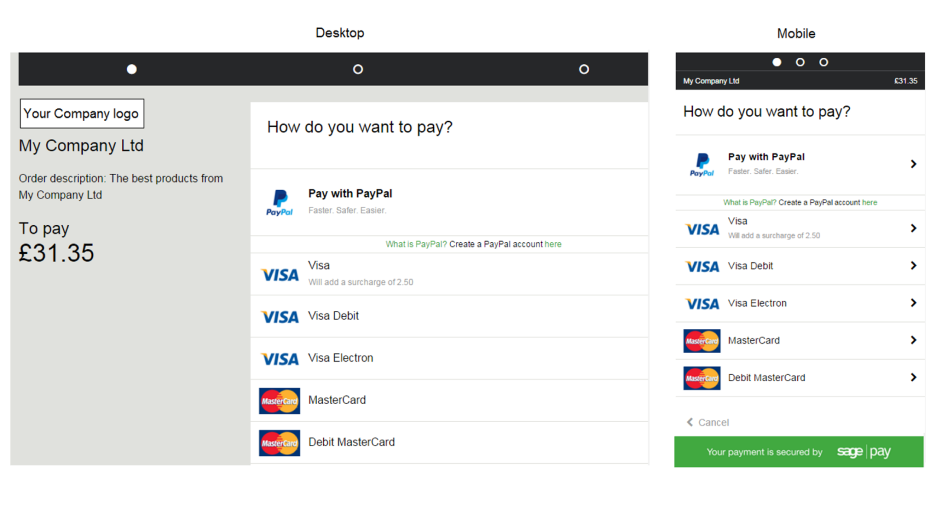
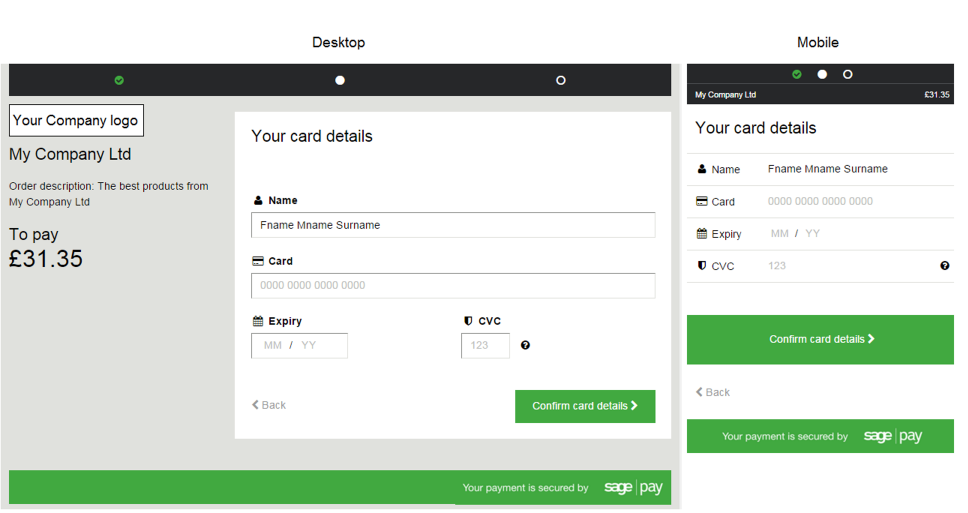
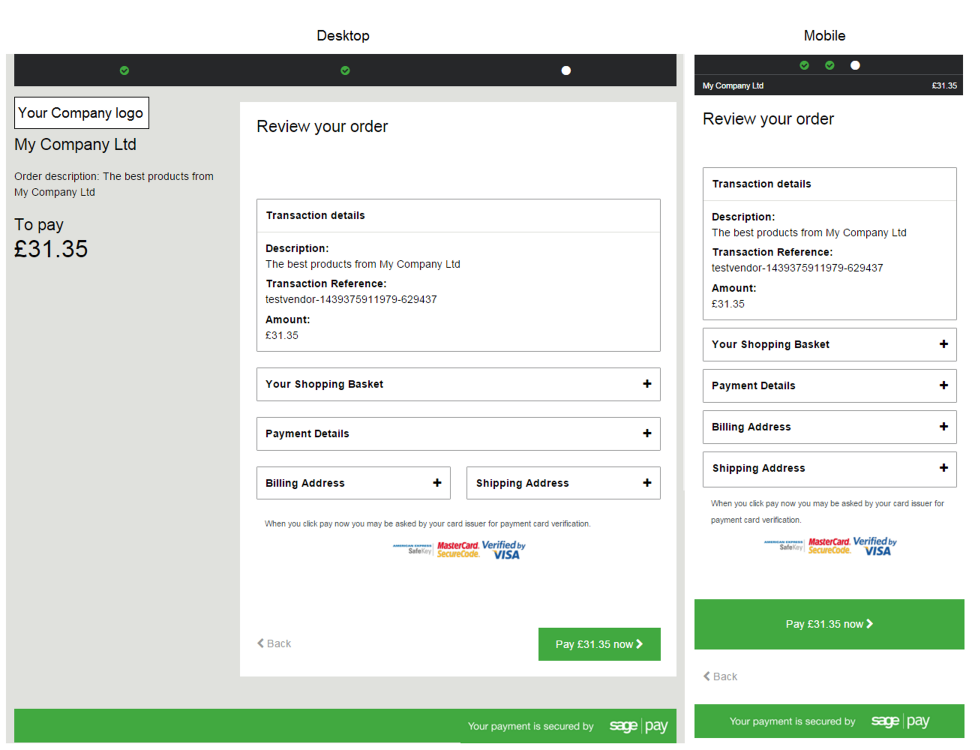
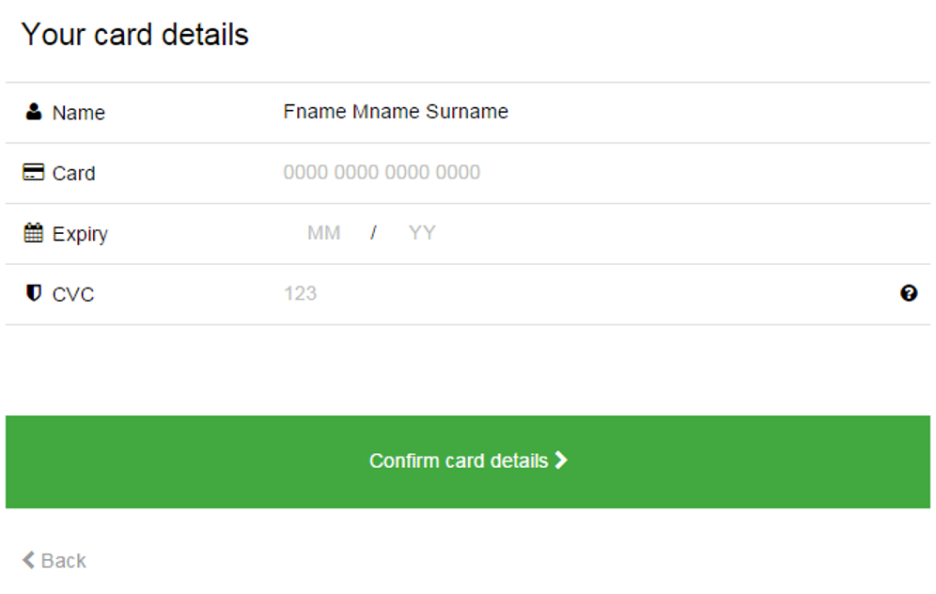
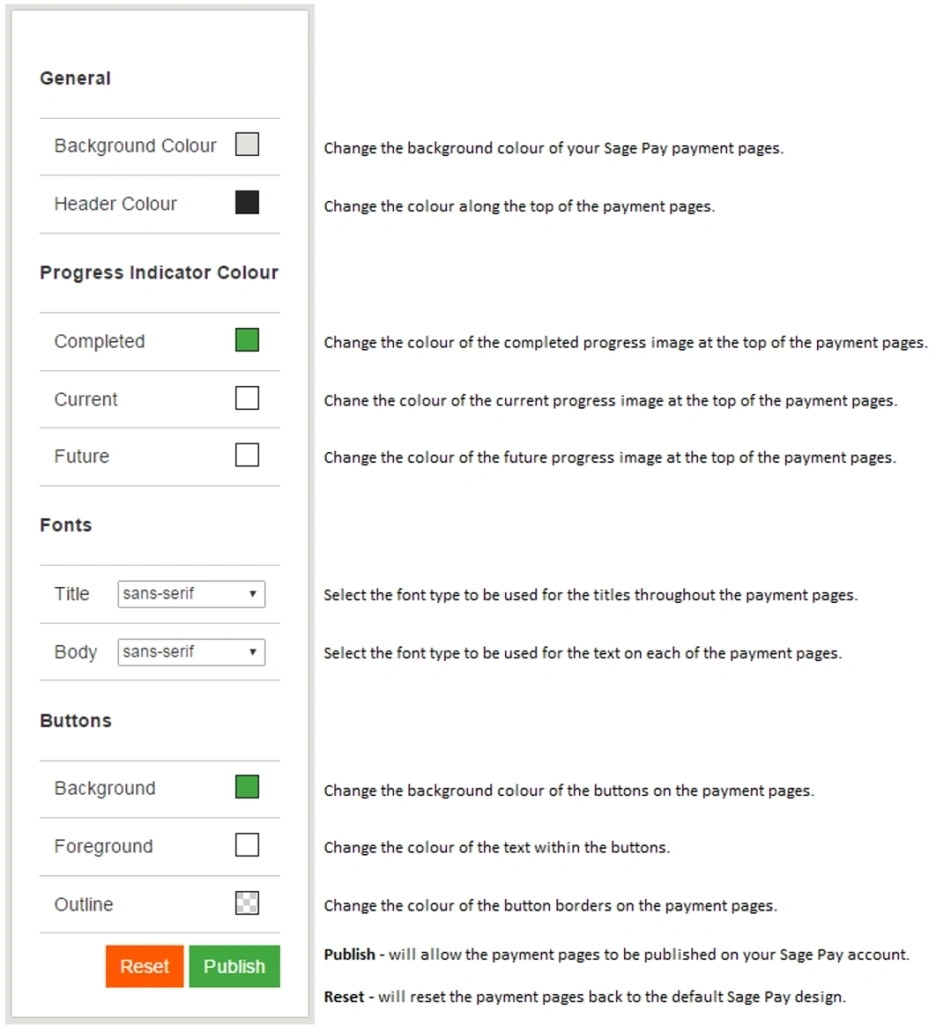
The page customiser has been added to both the Opayo test and live platforms giving you the ability to test your pages before you add them to your live account. Any changes that you make to the payment pages using the page customiser on the test platform will not impact your live account in any way. This way you have the ability to test out your new look payment pages before you do anything to your live account.
Search our help centre
Page customiser
Having the ability to quickly edit your payment pages is fundamental to any business. The newest feature of MyOpayo allows you to do just that.
For all customers using Opayo protocol 3.0 and higher, you can edit your own payment pages within MyOpayo.
The first thing you will need to do is log into your MyOpayo panel as a user with administrative rights. Once logged in click settings followed by page customiser from the menu along the left of the screen.
This will open the page customiser where you can edit your payment pages.
Before you can start using the page customiser to make any changes to your payment pages you will first need to ensure that your Opayo account is set to use the responsive payment pages.
To do this you will need to log into your MyOpayo account and go to the settings tab.
Once here, select settings again from the menu on the left of the page.
In the bottom left box you will see payment page templates – click the edit button for this and you can then select responsive for the payment pages.
You will then be able to use the page customiser for your Opayo payment pages.
Important: You will need to do this on both your test and live MyOpayo platforms to use the page customiser.
Types of pages
When making changes to your payment pages you have the ability to edit 3 types of payment pages:
Desktop – These are the standard payment pages that will be seen when using desktop computer and some mobile devices with a large enough screen.
Mobile – These are the standard payment pages optimised for use with smaller mobile devices – mobile phones and tablets with smaller screens.
iframe – For customers using the Opayo server method of integration. The iframe is embedded into your own website giving the shopper the impression the entire payment process is being carried out on your website.
Individual pages
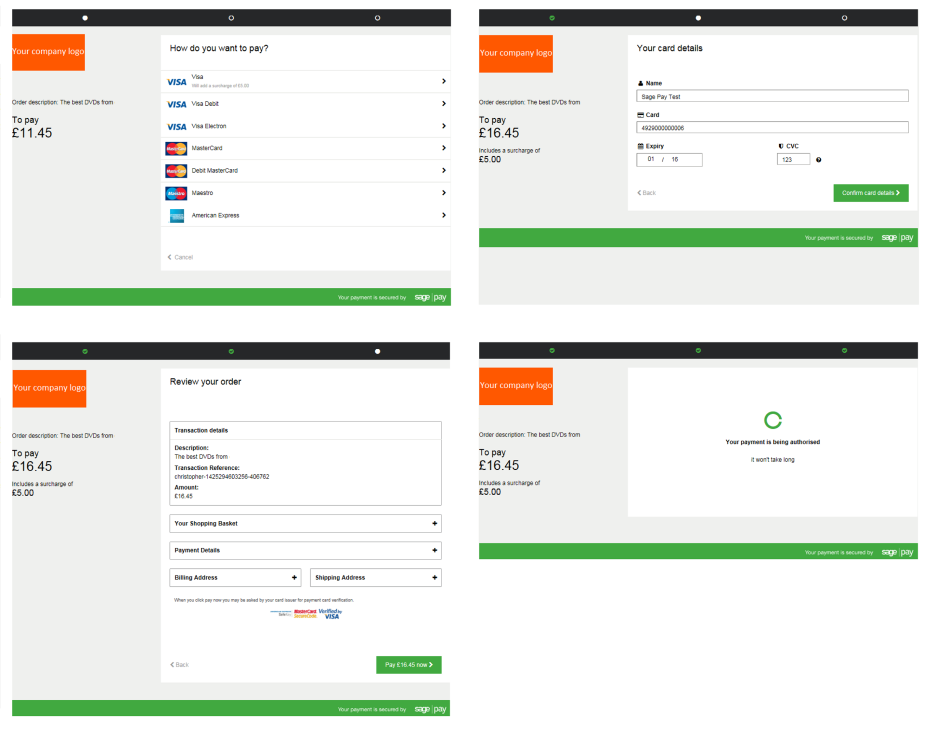
When editing the payment pages for both desktop and iframe there are 3 payment pages that you can edit:
Card selection page – Here the shopper will select the payment type they will be using to make the purchase. They will be able to choose from all of the cards available on your account.
Card details page – This page is used to capture the card details when the transaction is processed. Information such as name, card number, and security code (CVC) are captured here.
Order Summary page – The final page is the summary page where the shopper can review their order before sending for authorisation.
If you are using Opayo server integration with the iframe on your website you will only be able to edit one page. This is the card details page.
Both the card selection and order confirmation pages are not available if you are using server iframe integration.
Editing your pages
To begin editing your payment pages you will first need to select the page you would like to change.
Once chosen you can then edit the page using the options available in the menu on the left of the page.
These options allow you to change the look and feel of your payment pages.
Any change you make to one page will be applied to all payment pages – you cannot have multiple designs across each individual page.
The requirements for using the Opayo page customiser are:
You must be processing transactions using the Opayo protocol version 3.00 or higher.
You are using Opayo form or server methods of integration.
You are processing ecommerce transactions through a webstore.
If you do not meet the above requirements you will unfortunately not be eligible to use the page customiser.
Immediately. Once you have made the changes to your payment pages and click publish this will update your account and the pages will be available straight away.
As many as you need. You are not limited to a certain amount of times you change your payment pages.
You are free to edit and publish your pages as often as you need.
Yes, this is only the first release of the page customiser. As more releases are scheduled you will be able to make more changes to your payment pages.
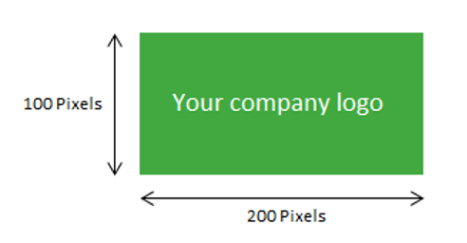
All you need to do to add your company logo to your payment pages is send us an email to support@opayo.io with your company logo as an attachment.
Your logo must be submitted in .gif format. Any logos not in this format will be rejected.
Once we have received your logo we will do the rest for you.
If the logo does not meet these requirements we will not be able to add this to your account.
We also need all images that are to be added to the payment pages to be sent to us from the listed billing contact on the account.
If we do not receive the request to add the logo to the account from the listed contact it will not be added to the account.
Once you have sent us your logo it normally takes between 24-48 hours to add onto your account.
After we have added the logo to your account it will take 15 minutes to appear on your payment pages.
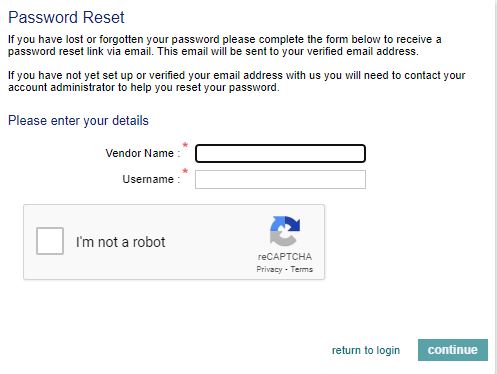
On the login screen you will be able to select lost your password? from the list below the password box.
You will then be taken to a screen where you will need to enter your vendor name, and username. You will also need to verify the details within the capture response box.
After you have confirmed the details and selected continue a password retrieval link will be sent to your email address.
Once the password has been requested we will send you a link that you can access to change your password. By clicking on the link you will be taken to the password reset page.
You will then be able to create a new password for your user and log back into your MyOpayo.
Administration user & password
When logging into your MyOpayo for the first time you will need to do so as the main administrative user.
The admin user is set-up by Opayo and provided to you. You will use the admin user to manage your account and create additional users who can access your MyOpayo admin panel.
When your account is first set-up we do not have any users for you. Because of that we need to ensure that you can access your account and create your own user set.
When you create your own users in MyOpayo you are able to give any user admin privileges.
Once the user has been created, you will be able to access your MyOpayo admin panel as your new user and have access to the same information as your Opayo admin user.
The only difference between your own user with admin rights and the Opayo admin user is the ability to view the encryption password for your account.
The Opayo admin user has access to view the encryption password – for form integration only – and is the only user who has the ability to do so.
If we didn’t create a main user for your account you would not be able to access your MyOpayo admin panel and manage your transactions.
Your admin user only has access to the settings tab within MyOpayo.
Although you can manage your users, payment page templates, fraud prevention rules, and all other administrative actions you cannot view any transactions when logged in as the admin user.
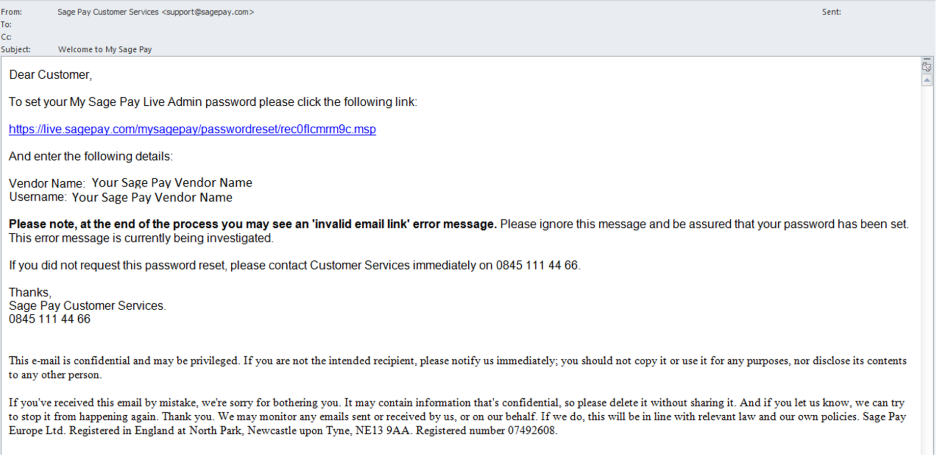
After your account has been added to either the test or live Opayo platforms we will send you an email that gives you all of the information you need to access your account and also includes a link.
You will need to click on the link in order to set your admin password.
Once you have done this you can then log into your MyOpayo as the admin user and create your own users to access on a day to day basis.
If you have forgotten your admin password you can request the link be re-sent via email to the listed billing contact on your Opayo account.
You can do this by calling our support team and they will be able to verify your details and re-send the information to you.
It is important to remember that if you already have created a user with admin rights you may not need to access your account as the main Opayo admin user.
Any created user with admin rights is able to view and manage MyOpayo as the Opayo admin user.
Custom Templates
If you require changes to your payment pages beyond the capabilities of the ‘Page Customiser’ and you have access to basic web development knowledge, then you can download our Custom Templates file. This set of instructions and resources provide you with a base template to re-design for your payment pages. These are then sent to our support team to attach to your account and be used against ‘Custom’ selection.
After your customised payment pages have been sent to us we will first add these onto your test account. Once you have activated these in test and you are happy with your pages we will then add these on to your live account.
The guide below can be used on both your test and live accounts.
You can only activate your customised payment pages once we have added them to either your test or live account, also you will need to activate your customised payment pages on both test and live individually.
Before you can activate the custom payment pages on your account, you must have had confirmation that these files have been uploaded and are ready to use by the support team.
To do this, login to your live MyOpayo or if you would like to activate your custom payment pages onto your test account login to your test MyOpayo.
After you have logged into your MyOpayo panel all you need to do is select the settings tab, followed by the settings option again.
Once you have selected settings you will be able activate the custom payment pages on your account. To do this click edit on the account settings box.
You will then be able to select custom payment pages you would like to apply to your account. There are 4 options available to you when changing the payment page templates.
- Default – The standard Opayo hosted and branded payment pages.
- Address read-only – Using the standard payment pages, however the address details cannot be changed.
- No address – Standard Opayo payment pages with no shopper address details on the pages.
- Custom – Your own custom payment pages that have been added to your account.
By selecting custom you will enable your custom payment pages onto your account. Once done all transactions processed through your account will be presented with your own payment pages, and not the Opayo standard paged.
Elavon Terms of Service UK
Domestic and Multinational Customers
UK Operating Guide
The point-of-sale procedures
Opayo Merchant Terms & Conditions
(Opayo gateway only)


